
注:在某些国家或地区,使用反向代理可能涉及法律和合规问题。请确保你的操作符合当地法律法规。
今天,我尝试从 GitHub 下载开源项目到我的云电脑(非中国大陆地区),但遇到了连通性问题。于是,我想到了使用反向代理来解决问题,并决定写一篇教程,以帮助其他可能遇到类似问题的小白用户。
此教程部分内容参考记一次Github镜像站搭建 - 木末の小站 - 奇思妙想之处 (233c.cn) 但优化了许多内容,借此解决小白用户不会使用nginx的问题
准备工作:
首先我们应购买一个域名并解析到你的服务器上,并申请好SSL证书,此处阿里云与腾讯云均有完整教程,本文不再赘述。
正式开始:
首先为我们的vps安装debian12的系统
dd指令
apt update -y
apt install wget -y
wget --no-check-certificate -qO InstallNET.sh 'https://cdn.jsdelivr.net/gh/leitbogioro/Tools@master/Linux_reinstall/InstallNET.sh' && chmod a+x InstallNET.sh
bash InstallNET.sh -debian 12 -mirror "http://mirrors.ustc.edu.cn/debian/"
然后为我们的vps安装1panel面板
1panel官网: 在线安装 - 1Panel 文档
debian12 一键安装指令
curl -sSL https://resource.fit2cloud.com/1panel/package/quick_start.sh -o quick_start.sh && bash quick_start.sh请按照指引进行安装
安装好后我们打开1panel面板
首先点开应用商店,安装OpenResty
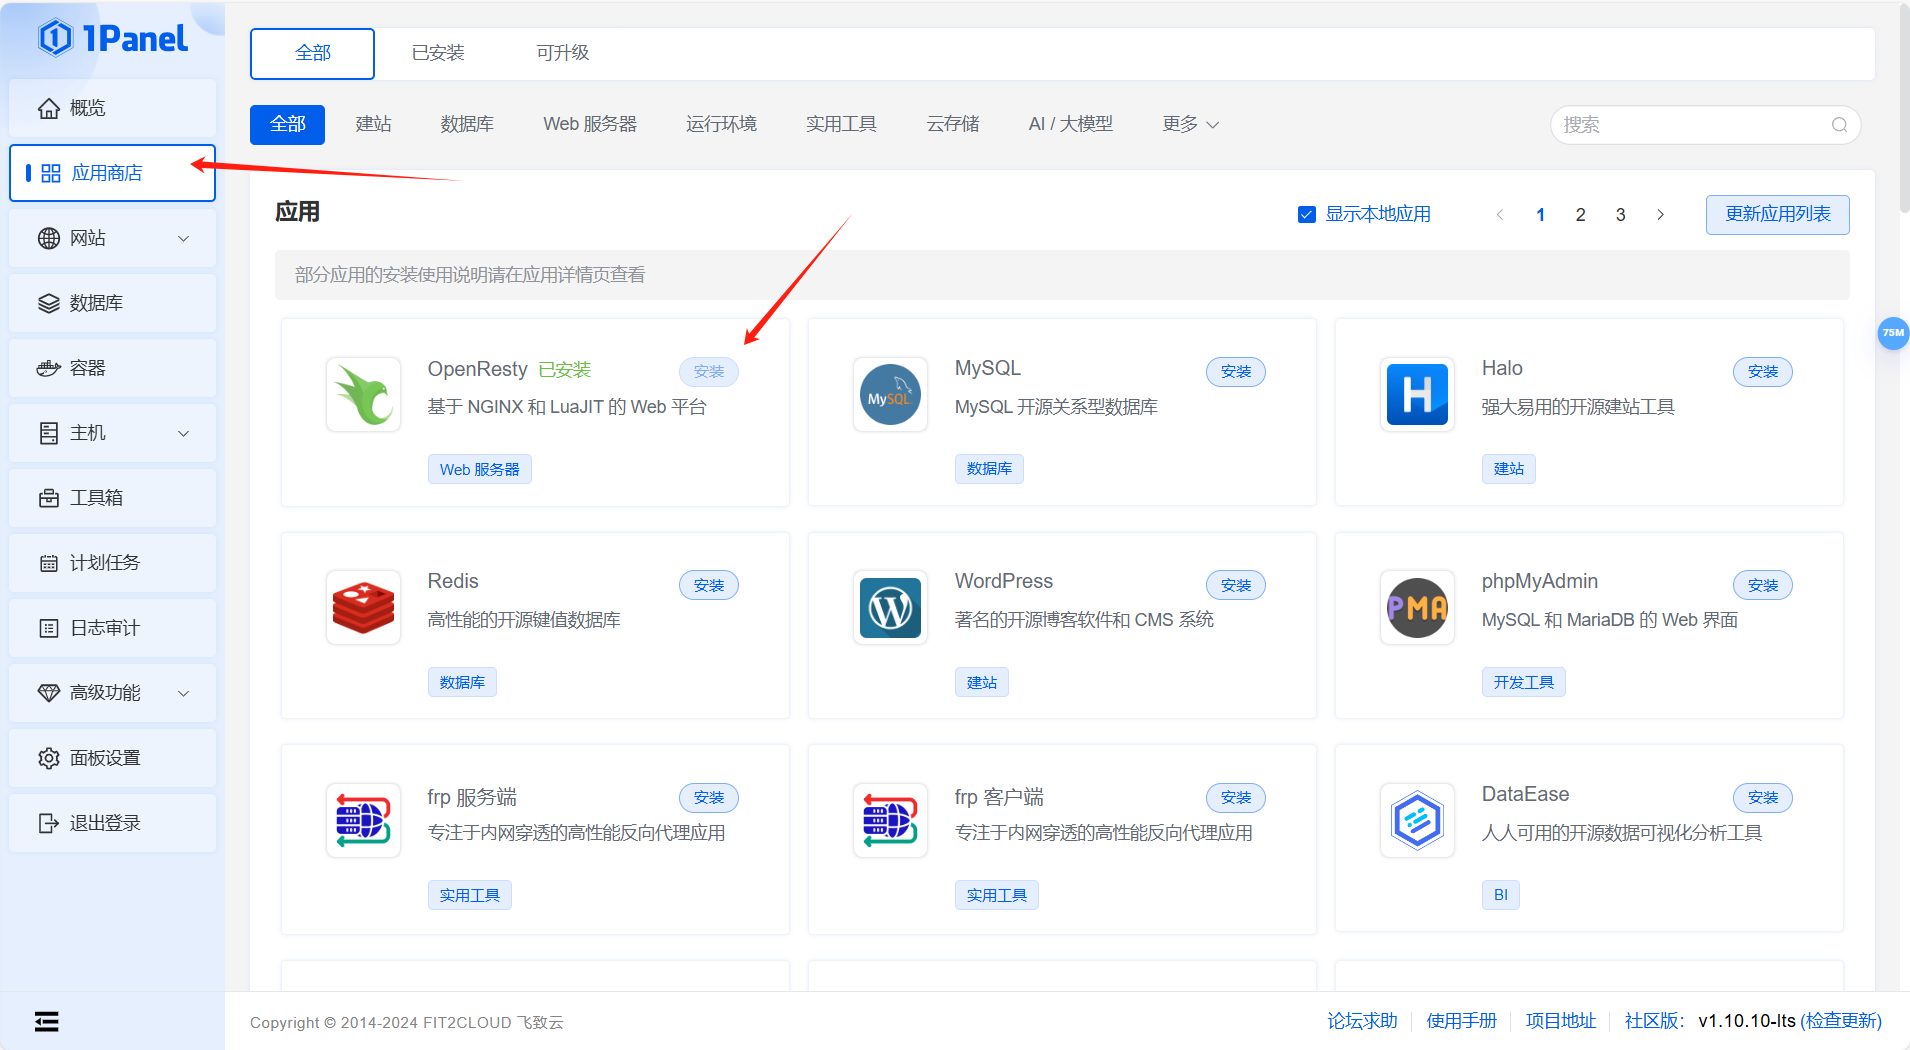
全部默认配置进行安装即可
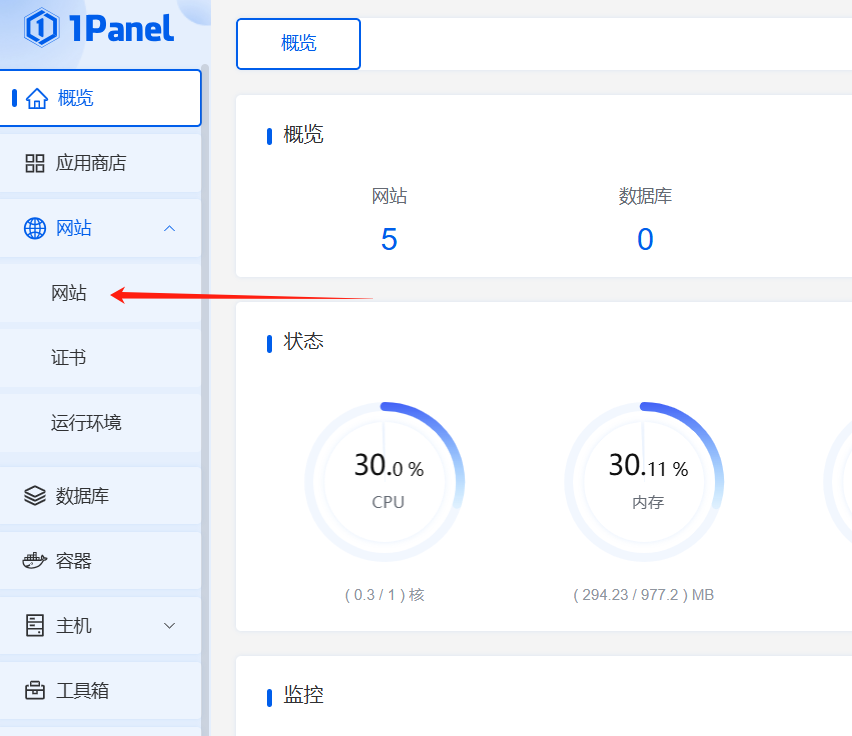
然后我们打开 网站-网站
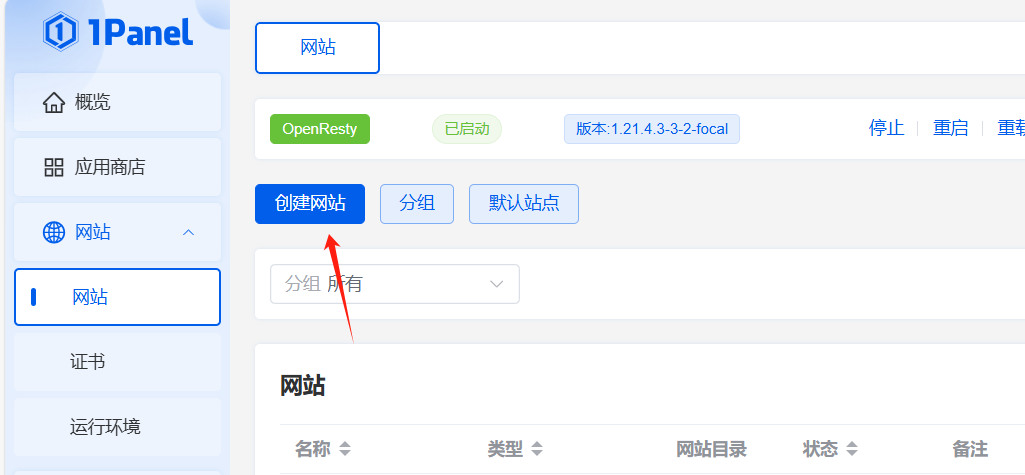
创建网站
反向代理
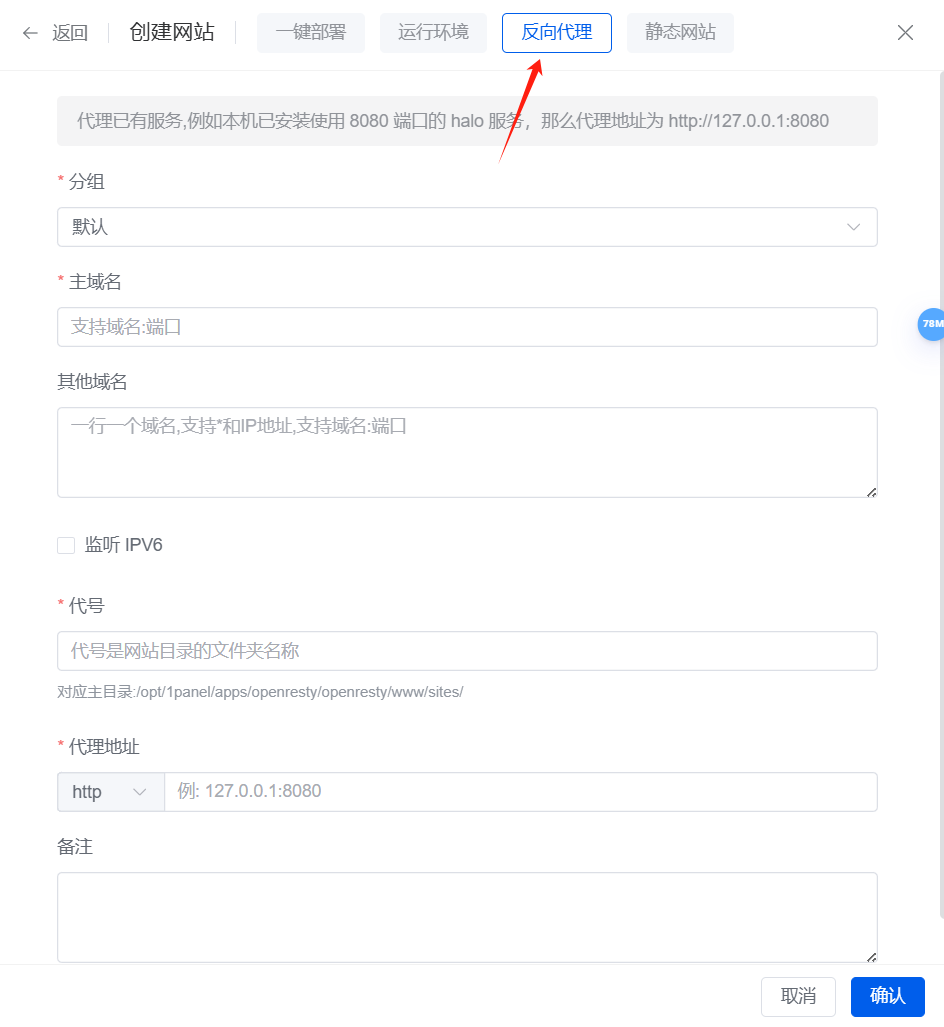
按照这个图片填写好
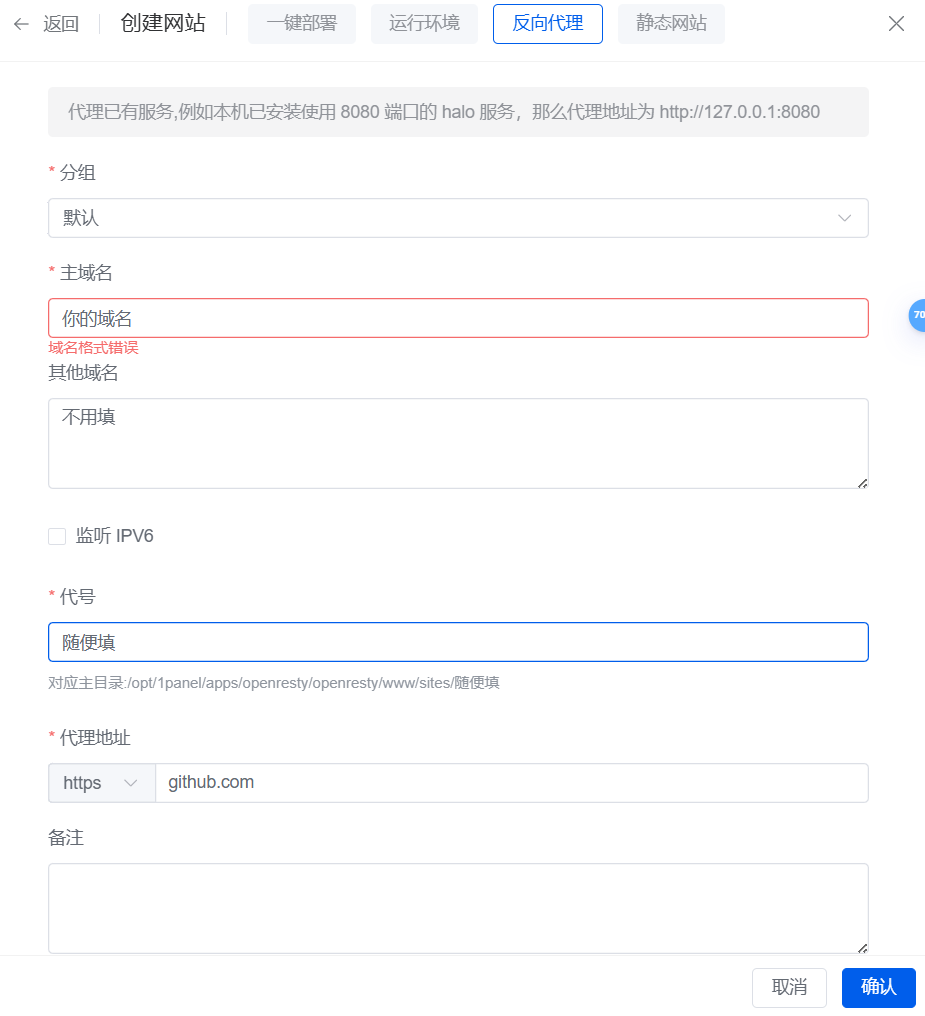
在创建好后请点击“确认”
随后我们重复刚刚的操作再创建个反向代理站点并按下面这张图配置好

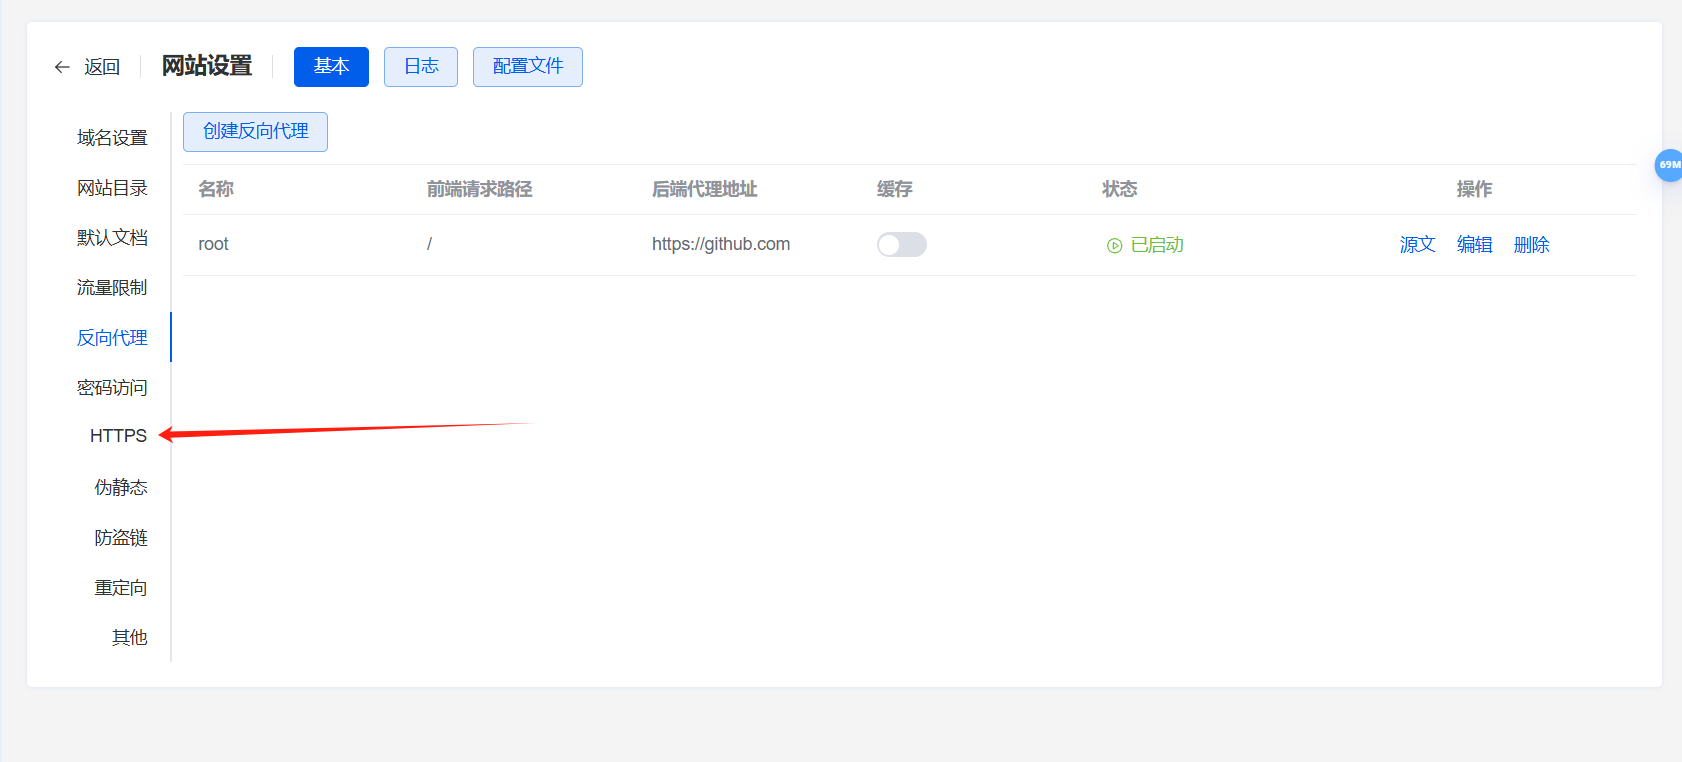
在创建好后,返回“网站-网站”,随后我们点开第一个站点的“配置”并找到反向代理界面
点击“源文”

将以下代码粘贴(要修改一部分)
请将“你的域名”和“你的二级域名”替换为刚刚解析过来的域名
不需要加“http://” “https://”之类的协议,也不要在结尾带上“/”,只需要填写纯域名!
建议直接ctrl+F进行替换!
--
补充 需要三个域名 第三个域名前面的配置是一样的
#再次强调
#请将“你的域名”和“你的二级域名”替换为刚刚解析过来的域名
#不需要加“http://” “https://”之类的协议,也不要在结尾带上“/”,只需要填写纯域名!
#建议直接ctrl+F进行替换!
location ^~ / {
proxy_pass https://github.com;
proxy_set_header Host github.com;
proxy_set_header X-Real-IP $remote_addr;
proxy_set_header X-Forwarded-For $proxy_add_x_forwarded_for;
proxy_set_header REMOTE-HOST $remote_addr;
add_header X-Cache $upstream_cache_status;
#Set Nginx Cache
#解决pjax问题
proxy_hide_header x-pjax-url;
add_header x-pjax-url "https://你的域名$request_uri";
#raw替换
proxy_redirect https://raw.githubusercontent.com https://你的二级域名;
proxy_redirect https://github.githubassets.com https://你的第二个二级域名;
proxy_set_header Accept-Encoding "";
sub_filter_once off;
sub_filter "//github.com" "//你的域名";
sub_filter "//raw.githubassets.com" "//你的二级域名";
sub_filter "//github.githubassets.com" "//你的第二个二级域名";
set $static_filexskBQvHR 0;
if ( $uri ~* "\.(gif|png|jpg|css|js|woff|woff2)$" ) {
set $static_filexskBQvHR 1;
expires 12h;
}
if ( $static_filexskBQvHR = 0 ) {
add_header Cache-Control no-cache;
}
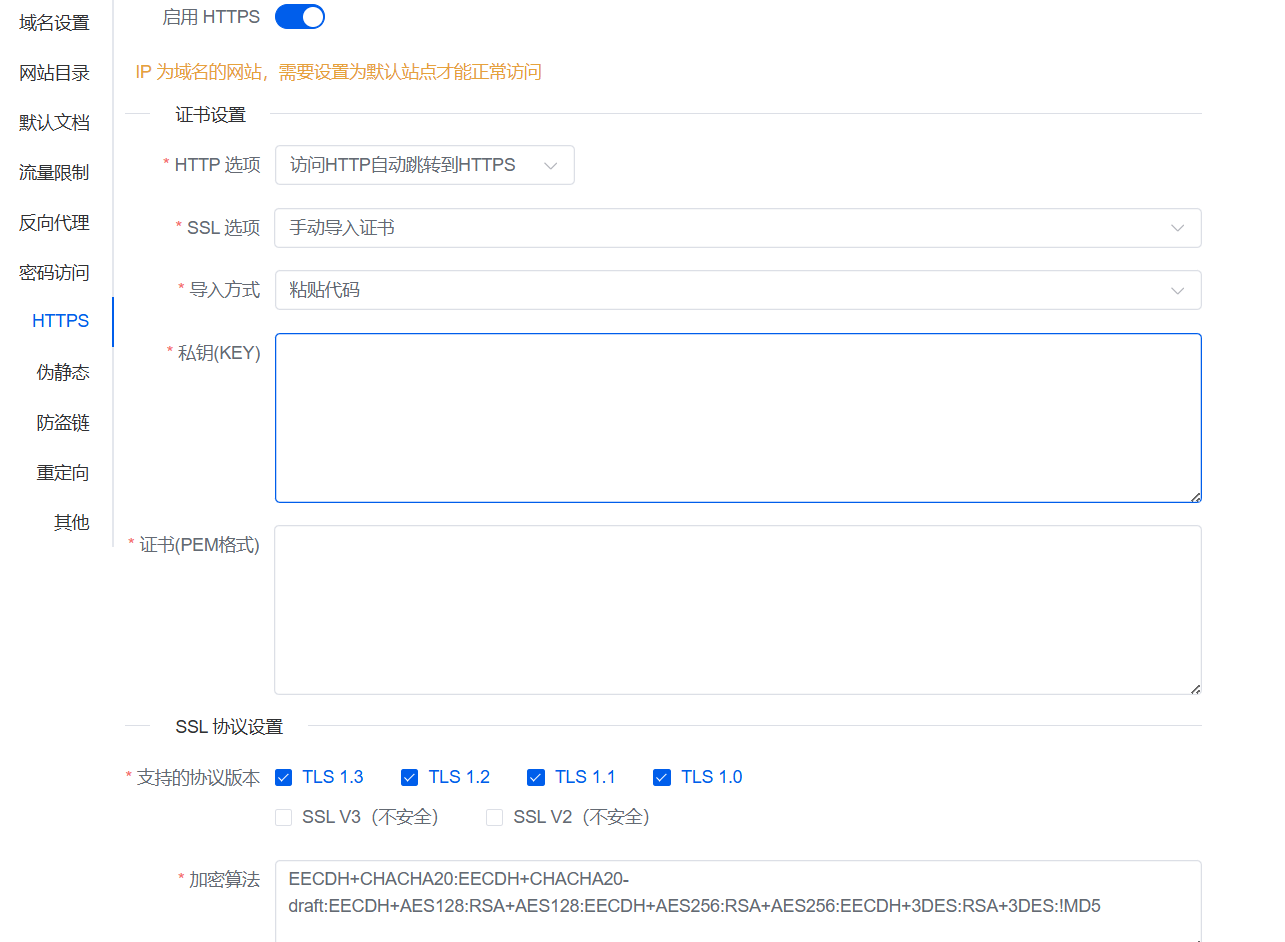
}填写并保存好后,我们点击HTTPS
选择“粘贴代码”并将之前申请的证书内容粘贴进去
保存后打开你的二级域名的反向代理界面,依旧是点开“源文”
粘贴以下代码(无需修改)
location ^~ / {
        proxy_pass https://raw.githubusercontent.com;
        proxy_set_header Host raw.githubusercontent.com;
        proxy_set_header X-Real-IP $remote_addr;
        proxy_set_header X-Forwarded-For $proxy_add_x_forwarded_for;
        proxy_set_header REMOTE-HOST $remote_addr;

        add_header X-Cache $upstream_cache_status;

        #proxy_hide_header content-security-policy;
        #proxy_hide_header Strict-Transport-Security;
        #proxy_hide_header set-cookie;
        #proxy_hide_header x-pjax-url;

        #Set Nginx Cache
        set $static_fileHDokVEBC 0;
        if ( $uri ~* "\.(gif|png|jpg|css|js|woff|woff2)$" ) {
            set $static_fileHDokVEBC 1;
            expires 12h;
        }
        if ( $static_fileHDokVEBC = 0 ) {
            add_header Cache-Control no-cache;
        }
    }
保存后去HTTPS中进行和刚刚主域名一样的设置
--
补充
仅上文配置无法加载css,所以需要第二个二级域名
和上文一样的操作,第二个二级域名源文处粘贴
location ^~ / {
        proxy_pass https://github.githubassets.com;
        proxy_set_header Host github.githubassets.com;
        proxy_set_header X-Real-IP $remote_addr;
        proxy_set_header X-Forwarded-For $proxy_add_x_forwarded_for;
        proxy_set_header REMOTE-HOST $remote_addr;

        add_header X-Cache $upstream_cache_status;

        #proxy_hide_header content-security-policy;
        #proxy_hide_header Strict-Transport-Security;
        #proxy_hide_header set-cookie;
        #proxy_hide_header x-pjax-url;

        #Set Nginx Cache
        set $static_fileHDokVEBC 0;
        if ( $uri ~* "\.(gif|png|jpg|css|js|woff|woff2)$" ) {
            set $static_fileHDokVEBC 1;
            expires 12h;
        }
        if ( $static_fileHDokVEBC = 0 ) {
            add_header Cache-Control no-cache;
        }
    }
这样就可以了
这时我们应该就可以通过自己的域名访问自己搭建的github镜像站了!